The Complete Guide to Shopify Conversion Tracking in 2026
The Complete Guide to Shopify Conversion Tracking in 2026
If you are running paid ads for your Shopify store, your Shopify conversion tracking is the single most important thing you need to get right. Not your creative. Not your targeting. Not your bid strategy. Your tracking.
Why? Because every decision Meta and Google make about your ads — who sees them, how much you pay per click, and which campaigns get budget — depends on the conversion data those platforms receive from your store.
And in 2026, that data is broken for most merchants.
TL;DR
Browser-based tracking (Meta Pixel, Google tag) is missing 20-40% of your conversions due to ad blockers, iOS privacy changes, and cookie restrictions. To fix it, you need server-side tracking (Meta CAPI + Google Enhanced Conversions) running alongside your browser pixels. The easiest way to set this up on Shopify is with a tracking app like ReclaimROAS, which handles both platforms automatically.
What Is Conversion Tracking, and Why Should You Care?
Conversion tracking is how ad platforms like Meta and Google know when someone who clicked your ad actually bought something. When a customer clicks your ad, lands on your store, and completes a purchase, a signal is supposed to fire back to the ad platform saying, “This click led to a sale worth $85.”
That signal is everything.
Meta and Google use it to figure out which audiences convert, which ads work, and how to spend your budget. Without it, their algorithms are flying blind. They cannot tell the difference between an ad that generated $10,000 in sales and one that generated nothing.
For you as a merchant, broken conversion tracking means three things. Your reported ROAS is wrong. Your cost per acquisition looks higher than it actually is. And the ad platform’s algorithm starts making poor decisions about who to show your ads to.
In other words, you are paying more for worse results, and you do not even know it.
What Changed: Why Tracking Broke
If you have been running ads for more than a couple of years, you might remember a time when you could install the Meta Pixel (formerly the Facebook Pixel), launch some campaigns, and see every purchase show up neatly in Ads Manager. Those days are over.
Several major shifts have fundamentally changed how tracking works on the web.
iOS 14 and App Tracking Transparency
In 2021, Apple released iOS 14.5 with App Tracking Transparency (ATT). This required every app — including Instagram, Facebook, and Safari — to ask users for permission before tracking them across other apps and websites.
The result? Roughly 75-85% of iOS users opted out. Since iPhone users make up a significant portion of ecommerce traffic (often 40-60% depending on your market), this was devastating for conversion tracking.
Meta lost visibility into a huge chunk of purchases happening on your store. The pixel could not connect the ad click to the purchase for most iPhone users.
Cookie Restrictions and Safari ITP
Safari’s Intelligent Tracking Prevention (ITP) has been progressively restricting cookies since 2017. First-party cookies set by JavaScript — which is how the Meta Pixel works — are now capped at just 7 days. In some cases, they expire within 24 hours.
This means if someone clicks your ad on a Monday and buys on the following Monday, that purchase is invisible to the Meta Pixel on Safari. And Safari is the default browser on every iPhone and Mac.
Chrome has also been tightening its cookie policies. While Google delayed full third-party cookie deprecation, restrictions have been steadily increasing, and the direction is clear: cookies are becoming less and less reliable.
Ad Blocker Growth
Ad blockers are now used by over 30% of internet users globally. Extensions like uBlock Origin and Adblock Plus do not just block ads — they block tracking scripts entirely.
When a visitor has an ad blocker installed, the Meta Pixel and Google Ads tag never load. The scripts are blocked before they can fire any events. As far as Meta and Google are concerned, that visitor does not exist, even if they buy a $500 product from your store.
The Compounding Effect
Here is what makes this so painful: these issues stack on top of each other. A customer using an iPhone with Safari and an ad blocker installed is completely invisible to your browser-based tracking. No pixel fires. No cookie persists. No conversion is recorded.
And you are not talking about a tiny edge case. Depending on your audience, 20-40% of your real conversions may be going unreported. That is not a rounding error — it is the difference between a profitable ad account and one you shut down because “the ads stopped working.”
The Real Cost of Broken Tracking
Broken tracking does not just mean your reports look wrong. It creates a cascade of real business problems.
Your Ad Algorithms Optimise Poorly
Meta and Google use machine learning to find more customers like the ones who already bought from you. But if 30% of your purchases are invisible, the algorithm is learning from an incomplete and skewed dataset.
It might optimise toward audiences that are easy to track rather than audiences that actually buy. It is like trying to train a dog while randomly hiding the treats — the learning gets confused.
Your CPA Appears Higher Than It Is
If you had 100 real purchases but only 70 were tracked, your cost per acquisition looks 43% higher than it actually is. That makes profitable campaigns look unprofitable.
Merchants shut down campaigns that are actually making money because the reported numbers look bad. This is one of the most expensive consequences of broken tracking — not the tracking itself, but the bad decisions it leads to.
Your ROAS Is Understated
The same math applies to ROAS. If Meta reports $7,000 in attributed revenue when the real number is $10,000, your ROAS looks like 2.3x instead of 3.3x. You might reduce spend on a campaign that is actually your best performer.
You Make Bad Budget Decisions
When the data is wrong, every decision built on that data is wrong too. You allocate budget away from working campaigns. You double down on campaigns that look good on paper but are not actually driving incremental sales.
Over months, these compounding bad decisions can cost you far more than the tracking gap itself.
Tired of debugging tracking issues?
ReclaimROAS fixes your Shopify conversion tracking automatically. Install free from the Shopify App Store.
Install ReclaimROAS Free →The Two Types of Tracking
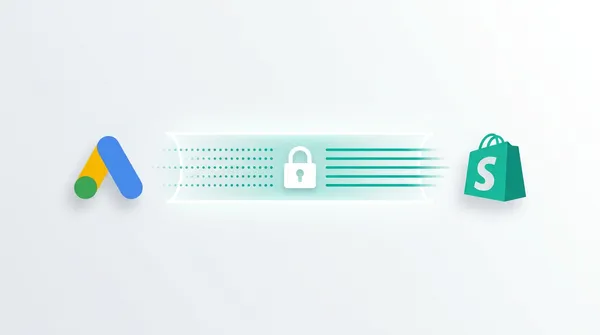
To understand how to fix your tracking, you need to understand the two fundamentally different ways conversion data can reach Meta and Google.
Browser-Side Tracking
This is the traditional approach, and it is what most merchants are running today.
How it works: You install a JavaScript snippet (the Meta Pixel or Google Ads tag) on your Shopify store. When a customer visits a page, adds to cart, or completes a purchase, the JavaScript fires an event in the customer’s browser. That event is sent from the browser directly to Meta or Google.
Why it breaks: Because everything happens in the browser, anything that interferes with the browser breaks the tracking. Ad blockers block the script from loading. Safari ITP restricts the cookies the script relies on. iOS privacy changes prevent cross-app tracking. If the customer’s browser does not cooperate, the event never fires.
Browser-side tracking is like sending a letter through a postal system where 30% of the mail carriers randomly throw letters away. The system works in theory, but you cannot rely on it for accurate delivery.
Server-Side Tracking
This is the modern approach that Meta and Google now strongly recommend.
How it works: Instead of relying on the customer’s browser, your server sends conversion data directly to Meta or Google’s server. When a purchase happens on your Shopify store, your server-side integration captures the order details and sends them through a secure API connection — Meta calls this the Conversions API (CAPI), and Google calls it Enhanced Conversions.
Why it is more reliable: The customer’s browser is not involved. Ad blockers cannot block a server-to-server request. Cookie restrictions do not apply. iOS privacy changes do not interfere. If a purchase happens on your Shopify store, the server knows about it regardless of what the customer’s browser is doing.
Why you need both: Meta and Google recommend running browser-side and server-side tracking together. The browser pixel captures browsing events (page views, add to carts) that happen before the purchase. The server-side integration reliably captures the purchase itself. Together with deduplication (so the same event is not counted twice), they give the ad platforms the most complete picture possible.
For a deeper dive into why your pixel might be missing purchases specifically, read our guide on why your Meta Pixel is not tracking on Shopify.
How to Audit Your Current Tracking
Before you fix anything, you need to understand how broken your tracking actually is. Here is a straightforward audit you can do in about 15 minutes.
Step 1: Compare Meta Ads Manager to Shopify Orders
Open Meta Ads Manager and look at the number of purchase conversions reported over the last 7 days. Then open your Shopify admin and count the actual orders that came from Meta ads over the same period (use the UTM parameters or the “first visit referrer” data in Shopify).
If Meta is reporting significantly fewer purchases than Shopify shows, you have a tracking gap. A 10-15% gap is common even with decent tracking. A 25-40% gap means you have serious issues.
Step 2: Check Google Ads Conversions vs Shopify
Do the same comparison for Google Ads. Look at your conversion count in Google Ads and compare it to the Shopify orders attributable to Google traffic.
Pay special attention to the conversion value. If Google is tracking the right number of conversions but the values are wrong (or all showing as $0), your value tracking is misconfigured.
Step 3: Use the Meta Pixel Helper
Install the Meta Pixel Helper Chrome extension. Visit your store, add a product to cart, and go through the checkout process. The extension will show you which pixel events are firing and whether they contain the right data.
Look for the Purchase event on your order confirmation page. If it is not there, your pixel is misconfigured. If it fires but is missing the value or currency parameters, your data is incomplete.
Step 4: Check Your Event Match Quality
In Meta Events Manager, navigate to your pixel and look at the Event Match Quality (EMQ) score for your Purchase event. This score (from 1 to 10) tells you how well Meta can match your conversion events to ad clicks.
A score below 6 means Meta is struggling to match events, which reduces the effectiveness of your campaigns. You want to aim for 7 or above. The main factors that improve EMQ are sending hashed customer data — email, phone number, name — along with the conversion event.
Server-side tracking (CAPI) makes it much easier to achieve a high EMQ because you can include customer data that the browser pixel cannot access.
Step 5: Look for Duplicate Events
In Meta Events Manager, check whether you see duplicate Purchase events. If you have multiple tracking apps or both Shopify’s native integration and a third-party pixel installed, you might be double-counting conversions. This is just as harmful as under-counting — it inflates your ROAS and leads to over-spending on underperforming campaigns.
The Tracking Stack You Need in 2026
Based on everything we have covered, here is the tracking setup every Shopify merchant running Meta and Google ads should have in place.
For Meta: Pixel + CAPI
You need both the Meta Pixel (browser-side) and the Conversions API (server-side) running together with proper deduplication.
The Meta Pixel captures browsing events — PageView, ViewContent, AddToCart, InitiateCheckout — as they happen in the browser. These help Meta understand the customer journey and build audiences for retargeting.
Meta CAPI reliably captures Purchase events (and ideally AddToCart and InitiateCheckout too) by sending them directly from your server to Meta. This ensures that even if the pixel fails to fire due to ad blockers, iOS restrictions, or cookie issues, the conversion still reaches Meta.
Deduplication is critical. When both the pixel and CAPI report the same purchase, Meta needs to know it is the same event so it does not double-count. This is done by sending a matching event_id with both the pixel event and the CAPI event.
For a detailed walkthrough on setting up CAPI, see our guide on Meta CAPI setup for Shopify.
For Google: Ads Tag + Enhanced Conversions
The same principle applies to Google. You need the standard Google Ads conversion tracking tag (browser-side) plus Enhanced Conversions (server-side enrichment).
The Google Ads tag works similarly to the Meta Pixel. It fires in the browser when a conversion happens and sends the data to Google.
Enhanced Conversions supplements the tag by sending hashed first-party customer data (email address, name, phone number, address) alongside the conversion. Google uses this data to improve attribution, especially for users who are signed into Google services.
Google’s own data shows that Enhanced Conversions can recover up to 19% more attributed conversions and reduce CPA by up to 13%. That is significant — it directly impacts how well Google’s Smart Bidding strategies (Target ROAS, Maximise Conversions) perform.
For more on setting this up, read our guide on Google Enhanced Conversions for Shopify.
Why You Need Both Browser and Server-Side
It is tempting to think, “If server-side tracking is more reliable, why bother with the pixel at all?” There are two good reasons.
First, browser-side tracking captures micro-events (page views, scroll depth, time on page) that are difficult to capture server-side. These events help the ad platforms understand engagement, not just purchases.
Second, Meta and Google explicitly recommend running both. Their algorithms are designed to use both sources of data. Running only server-side tracking means you miss out on the browsing behaviour signals that help the algorithm find your ideal customers.
The goal is not to replace browser-side tracking. It is to supplement it with server-side tracking so that the purchases that slip through the browser cracks still get reported.
How to Set Up Your Tracking Stack
You have three main options for implementing the full tracking stack on Shopify.
Option 1: Manual Setup
This involves adding tracking code directly to your Shopify theme and setting up server-side integrations through Meta and Google’s developer tools.
Pros: Free, full control over implementation.
Cons: Requires significant technical knowledge. You need to understand JavaScript, APIs, event deduplication, and data hashing. Debugging is time-consuming. Ongoing maintenance is required when platforms update their APIs or Shopify changes their checkout flow.
This option is really only viable if you have a developer on your team or a technical agency partner.
Option 2: Google Tag Manager (Server-Side)
Server-side Google Tag Manager (sGTM) is a powerful option. You set up a server-side container that processes tracking events and forwards them to Meta CAPI and Google Enhanced Conversions.
Pros: Highly customisable, supports multiple platforms, gives you full visibility into data flow.
Cons: Complex setup (requires a cloud hosting environment for the server container), ongoing hosting costs ($10-50 per month), and a steep learning curve. Most merchants need a developer or specialist agency to set this up and maintain it.
Option 3: A Shopify Tracking App
Apps like ReclaimROAS are designed to handle all of this automatically. You install the app, connect your Meta and Google accounts, and the app sets up both browser-side and server-side tracking with proper deduplication.
Pros: No code required, setup takes minutes, automatic updates when platforms change, dashboard to monitor what is being tracked and recovered.
Cons: Monthly cost (though many apps including ReclaimROAS offer free tiers).
For most Shopify merchants, an app is the right choice. The time and technical expertise required for manual setup or sGTM far outweigh the cost of a tracking app. Your time is better spent on your products and marketing, not debugging API integrations.
To see how ReclaimROAS handles this, check out our how it works page.
Choosing the Right Tracking Tool
If you decide to go with a tracking app (which we recommend for most merchants), you still need to pick the right one. The Shopify App Store has several options, and they differ significantly in features, complexity, and price.
Here are the key things to evaluate:
Platform coverage. Does the app support both Meta and Google? Some focus on only one platform, which means you would need two separate apps.
Server-side tracking. Does the app actually implement server-side tracking (CAPI and Enhanced Conversions), or does it just manage your browser pixels? Managing pixels is helpful, but it does not solve the fundamental tracking gap.
Ease of setup. Can you set it up yourself in a few minutes, or do you need a developer? For most Shopify merchants, simplicity matters.
Deduplication. Does the app properly deduplicate events so you are not double-counting conversions? This is a technical detail that has a big impact on data accuracy.
Pricing. Tracking apps range from free to hundreds of dollars per month. Make sure the pricing makes sense for your store’s size and ad spend.
Visibility. Can you see what the app is actually doing? A good tracking app should show you how many conversions it is recovering versus what the pixel alone captured.
We have written a detailed comparison of the top options in our best Shopify tracking apps in 2026 guide. It covers Littledata, Elevar, Triple Whale, OnePixel, and ReclaimROAS with an honest assessment of each.
Common Mistakes to Avoid
Before we wrap up, here are some tracking mistakes we see Shopify merchants make regularly.
Running Multiple Tracking Apps Simultaneously
If you install two or three tracking apps that all manage your Meta Pixel, you will likely end up with duplicate events, conflicting configurations, and data that is worse than if you had just used one app. Pick one tool and commit to it.
Ignoring Event Match Quality
A low Event Match Quality score in Meta Events Manager is one of the clearest signs that your tracking is underperforming. If your score is below 6, you are leaving attribution accuracy on the table. Server-side tracking with customer data (hashed email and phone) is the most effective way to improve this score.
Setting Shopify Data Sharing to “Standard” Instead of “Maximum”
In Shopify’s Facebook & Instagram sales channel settings, there is a data sharing level setting. Many merchants leave it on “Standard” when it should be set to “Maximum.” This is a free improvement that takes 30 seconds.
Not Testing After Changes
Whenever you change your tracking setup — whether you install a new app, update your pixel, or modify your Shopify theme — test the full flow. Add a product to cart, complete a test purchase, and verify the events appear correctly in Meta Events Manager and Google Ads.
Assuming “It Worked Before, So It Still Works”
Tracking can break silently. Platform API changes, Shopify updates, browser changes, and app conflicts can all degrade your tracking without any obvious error. Audit your tracking at least once a month using the steps outlined earlier in this guide.
What Good Tracking Looks Like
When your tracking is set up correctly, here is what you should see:
In Meta Events Manager: Purchase events appear with both “Browser” and “Server” sources. Your Event Match Quality is 7 or above. The number of purchases closely matches your Shopify order count (within 5-10%).
In Google Ads: Conversion counts align with Shopify orders from Google traffic. Conversion values match the actual order values. Enhanced Conversions is enabled and showing as active.
In your ad performance: You will likely see your reported ROAS increase — not because your ads are suddenly performing better, but because you are finally seeing the full picture. More attributed conversions mean the algorithm gets better data, which over time leads to genuinely better performance.
This is the virtuous cycle that good tracking creates: accurate data leads to better algorithmic decisions, which leads to better ad performance, which leads to more conversions, which feeds more data back into the system.
Conclusion
Shopify conversion tracking in 2026 requires more than just installing a pixel and hoping for the best. The privacy landscape has fundamentally changed, and merchants who do not adapt are paying more for ads and making decisions based on incomplete data.
The good news is that the fix is well-understood. You need browser-side tracking (Meta Pixel, Google Ads tag) supplemented with server-side tracking (Meta CAPI, Google Enhanced Conversions). You need proper deduplication. And you need to monitor your tracking regularly to make sure it stays healthy.
Whether you set this up manually, through Google Tag Manager, or with an app, the important thing is that you do it. Every day you run ads without server-side tracking is a day you are feeding bad data to the algorithms managing your budget.
Check out our pricing page to see which plan fits your store.
ReclaimROAS handles all of this automatically.
Install free on Shopify and start recovering your lost conversions in under 5 minutes. No code changes, no developer needed.
Install ReclaimROAS Free →